Organize Your Living Space with This Useful DIY Folding Shelf
Written by: Arron J. Staff writer @ Hyggehous.com
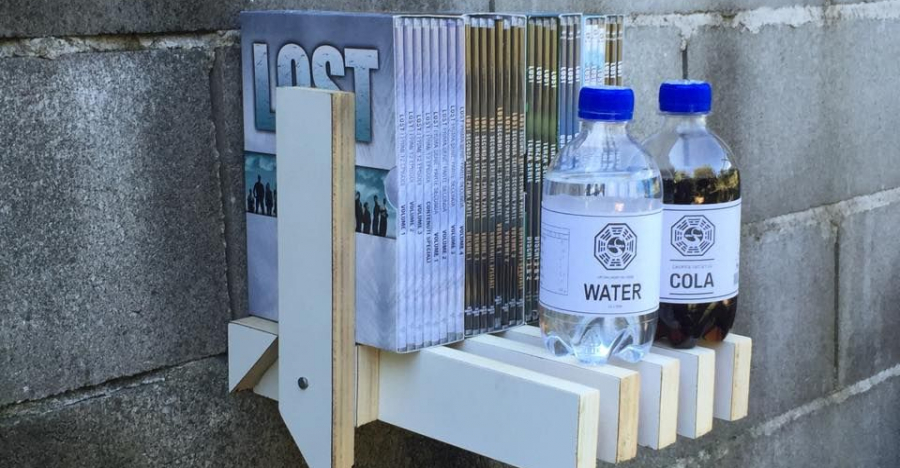
Photo Gallery
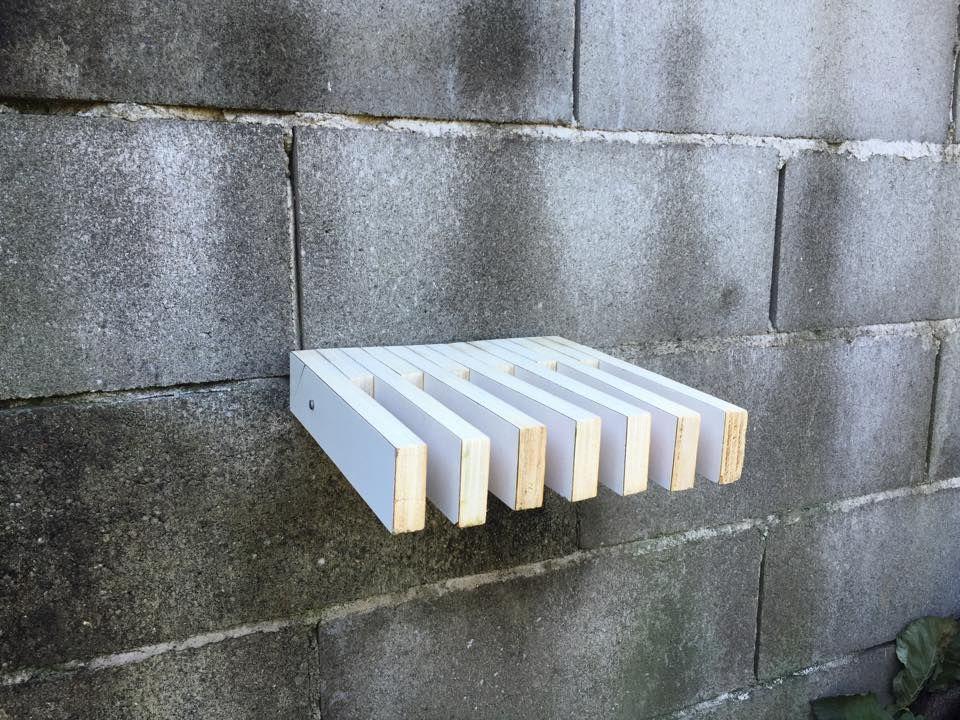
If you really enjoy DIY projects and need a part-time shelf in your living room, bathroom, or bedroom, then you might want to check out this excellent woodworking project that helps you create your very own folding shelf.
This do-it-yourself assignment can help you organize your space as well as your belongings, especially if you have a lot of books, CDs, DVDs, or knick-knacks that need to be organized. This woodworking project could also provide you with the ideal foldable shelves for your detergent bottles, cosmetics, or plants. You could even build more than one of these folding shelves to use whenever you need them and simply fold them up whenever you are not. Shop Tiny Homes One of the coolest aspects of this DIY folding shelf is you can fold part of it up while leaving some of it down, so if you need bookends to hold your books in place, voila you just fold the two end slats up while folding the remainder of the slats down. Someone also had the very creative idea of painting a picture on the underside of all the slats so that when the entire shelf is up, you would see a picture hanging on your wall rather than just the slats.
If you live in a tiny home, a small apartment, or even a small-sized room, these fold-up shelves would work very well, giving you space when you need it and shelves when you need them.
You could even make a slightly longer version of this folding shelf and attach it to the wall at arm-level while you are sitting down, and turn it into a folding desk. Another idea would be to expand this do-it-yourself folding shelf design into a much larger version that is big enough to hold a single mattress – that way, you could not only have a fold-up shelf, but you could also have a fold-up bed. You could even put one of these larger versions overtop the other and create your own fold-up bunk beds. There’s no end to this wonderful folding shelf woodworking idea to help save you space and make your life much easier.
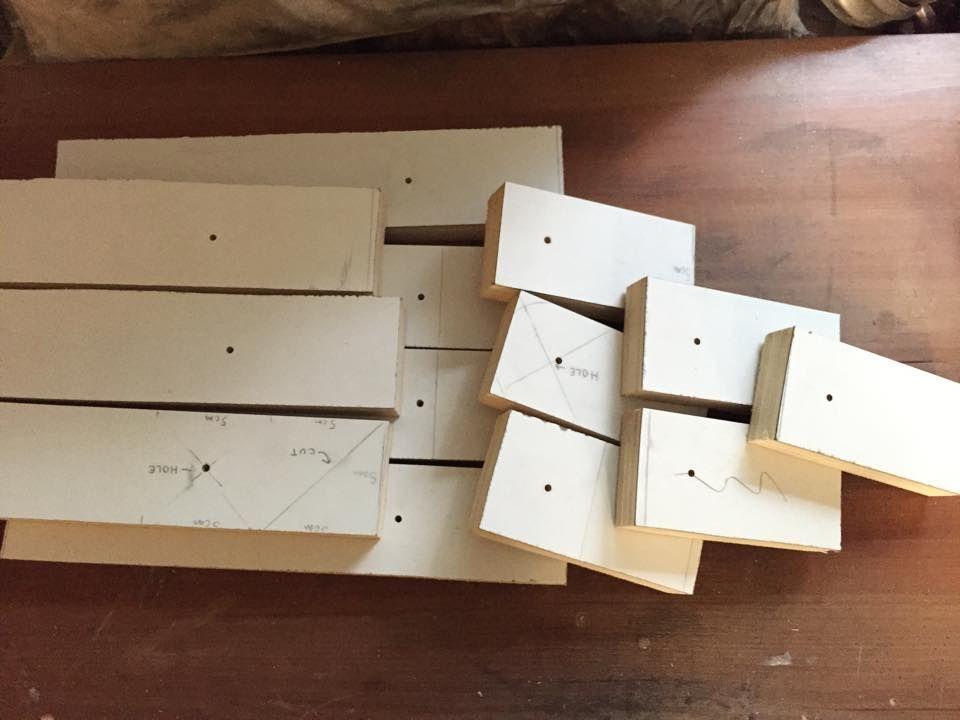
For this tutorial, you'll use 2 cm thick laminated plywood and to make the shelf 26 cm by 25 cm x 5 cm.
If you want to make your folding shelf the same way, you'll need 13 slats in total You'll cut 7 slats to 26 cm by 5 cm for the shelves and the stop blocks and then 6 pieces to 10 cm x 5 cm for the pivot supports. Once all of the pieces are cut to size, you can then make the holes in the pieces of wood that will allow you to connect them together. The holes for the pivot will be at the halfway point of the height which is 2.5 cm and at 7.5 cm from one side.
With all of the holes in place, you can then drill the holes into the wood.
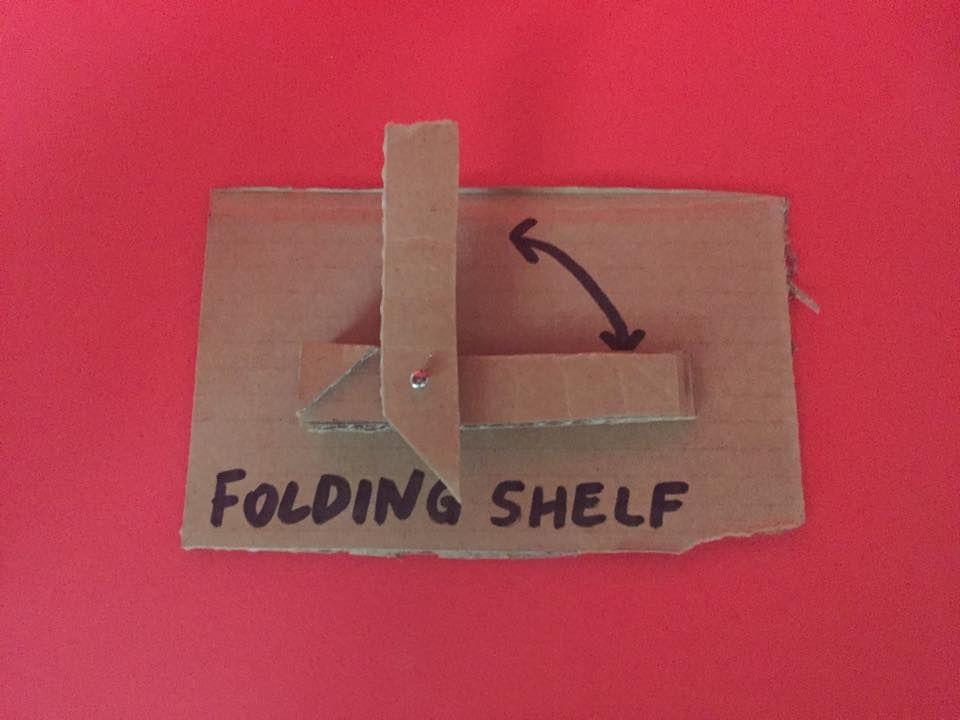
The pivot is the part that will connect the pivot supports to the longer slats which will help them rotate up and down. You'll use any metal rod, but Manuel used a metal handle from a paint bucket. Next, you'll make stop blocks to hold the pieces in place to create the shelf when the slats are folded down. You simply cut each one of the 7 longer pieces at 45° and then glue the stop blocks to the pivot supports. Then you can test everything out once it's ready and paint it any colour you like before anchoring it to the wall. Then, your homemade shelf is ready to use as you wish.

